How I Built an Instagram DM Autoresponder with n8n & Meta
If you have ever said, "I just want Instagram to answer the basic questions for me," welcome. That was me.
I did not want to manually reply to every "How do I join?", "Send the WhatsApp link," or "How do I get into the group?" message forever. I wanted a system that could handle the obvious questions, leave the real conversations for humans, and not feel like I duct-taped six random tutorials together at 2 AM.
So I built an Instagram DM autoresponder using n8n and the Meta Graph API.
And because nothing in automation is ever as clean as the diagram in your head, I also broke it, fixed it, accidentally made it spam 20 replies, and then tightened it into something I would actually trust.
If you want to build one too, here is the plain-English version.
What I Wanted It to Do
The goal was simple:
- someone sends a DM to the Instagram account
- Meta sends that event to n8n through a webhook
- n8n checks the message
- if it contains the right trigger words, n8n sends back a reply automatically
For this setup, I only wanted the bot to answer messages related to joining the community.
That means words and phrases like:
joinlinkgroupwhatsapphow to joinsign upsignupmembermembershipcommunitycrew
If the message says "good morning" or "nice hike today," the bot should mind its business.
The Stack
This build used:
- Instagram Professional Account
- Facebook Page connected to the Instagram account
- Meta Business settings
- Meta Graph API Explorer
- n8n running on a DigitalOcean droplet
- Meta Graph API endpoint:
https://graph.facebook.com/v21.0/me/messages
The production webhook ended up looking like this:
https://your-n8n-domain.com/webhook/instagram-dm-autoresponder
I am using a placeholder there on purpose. Publish the workflow pattern, not your live production callback URL.
Step 1: Make Sure Instagram and Facebook Are Actually Connected
This sounds basic, but if the account setup is wrong, everything after this is just very expensive confusion.
You need:
- the Instagram account connected to the Facebook Page
- message access turned on
- your Facebook user with full control of the Page
- the app and the Page living in the same Meta business setup
Here is what the Instagram/Page connection looked like on my end. I redacted the personal and business-specific bits, because a tutorial should teach the setup without turning into a data leak:
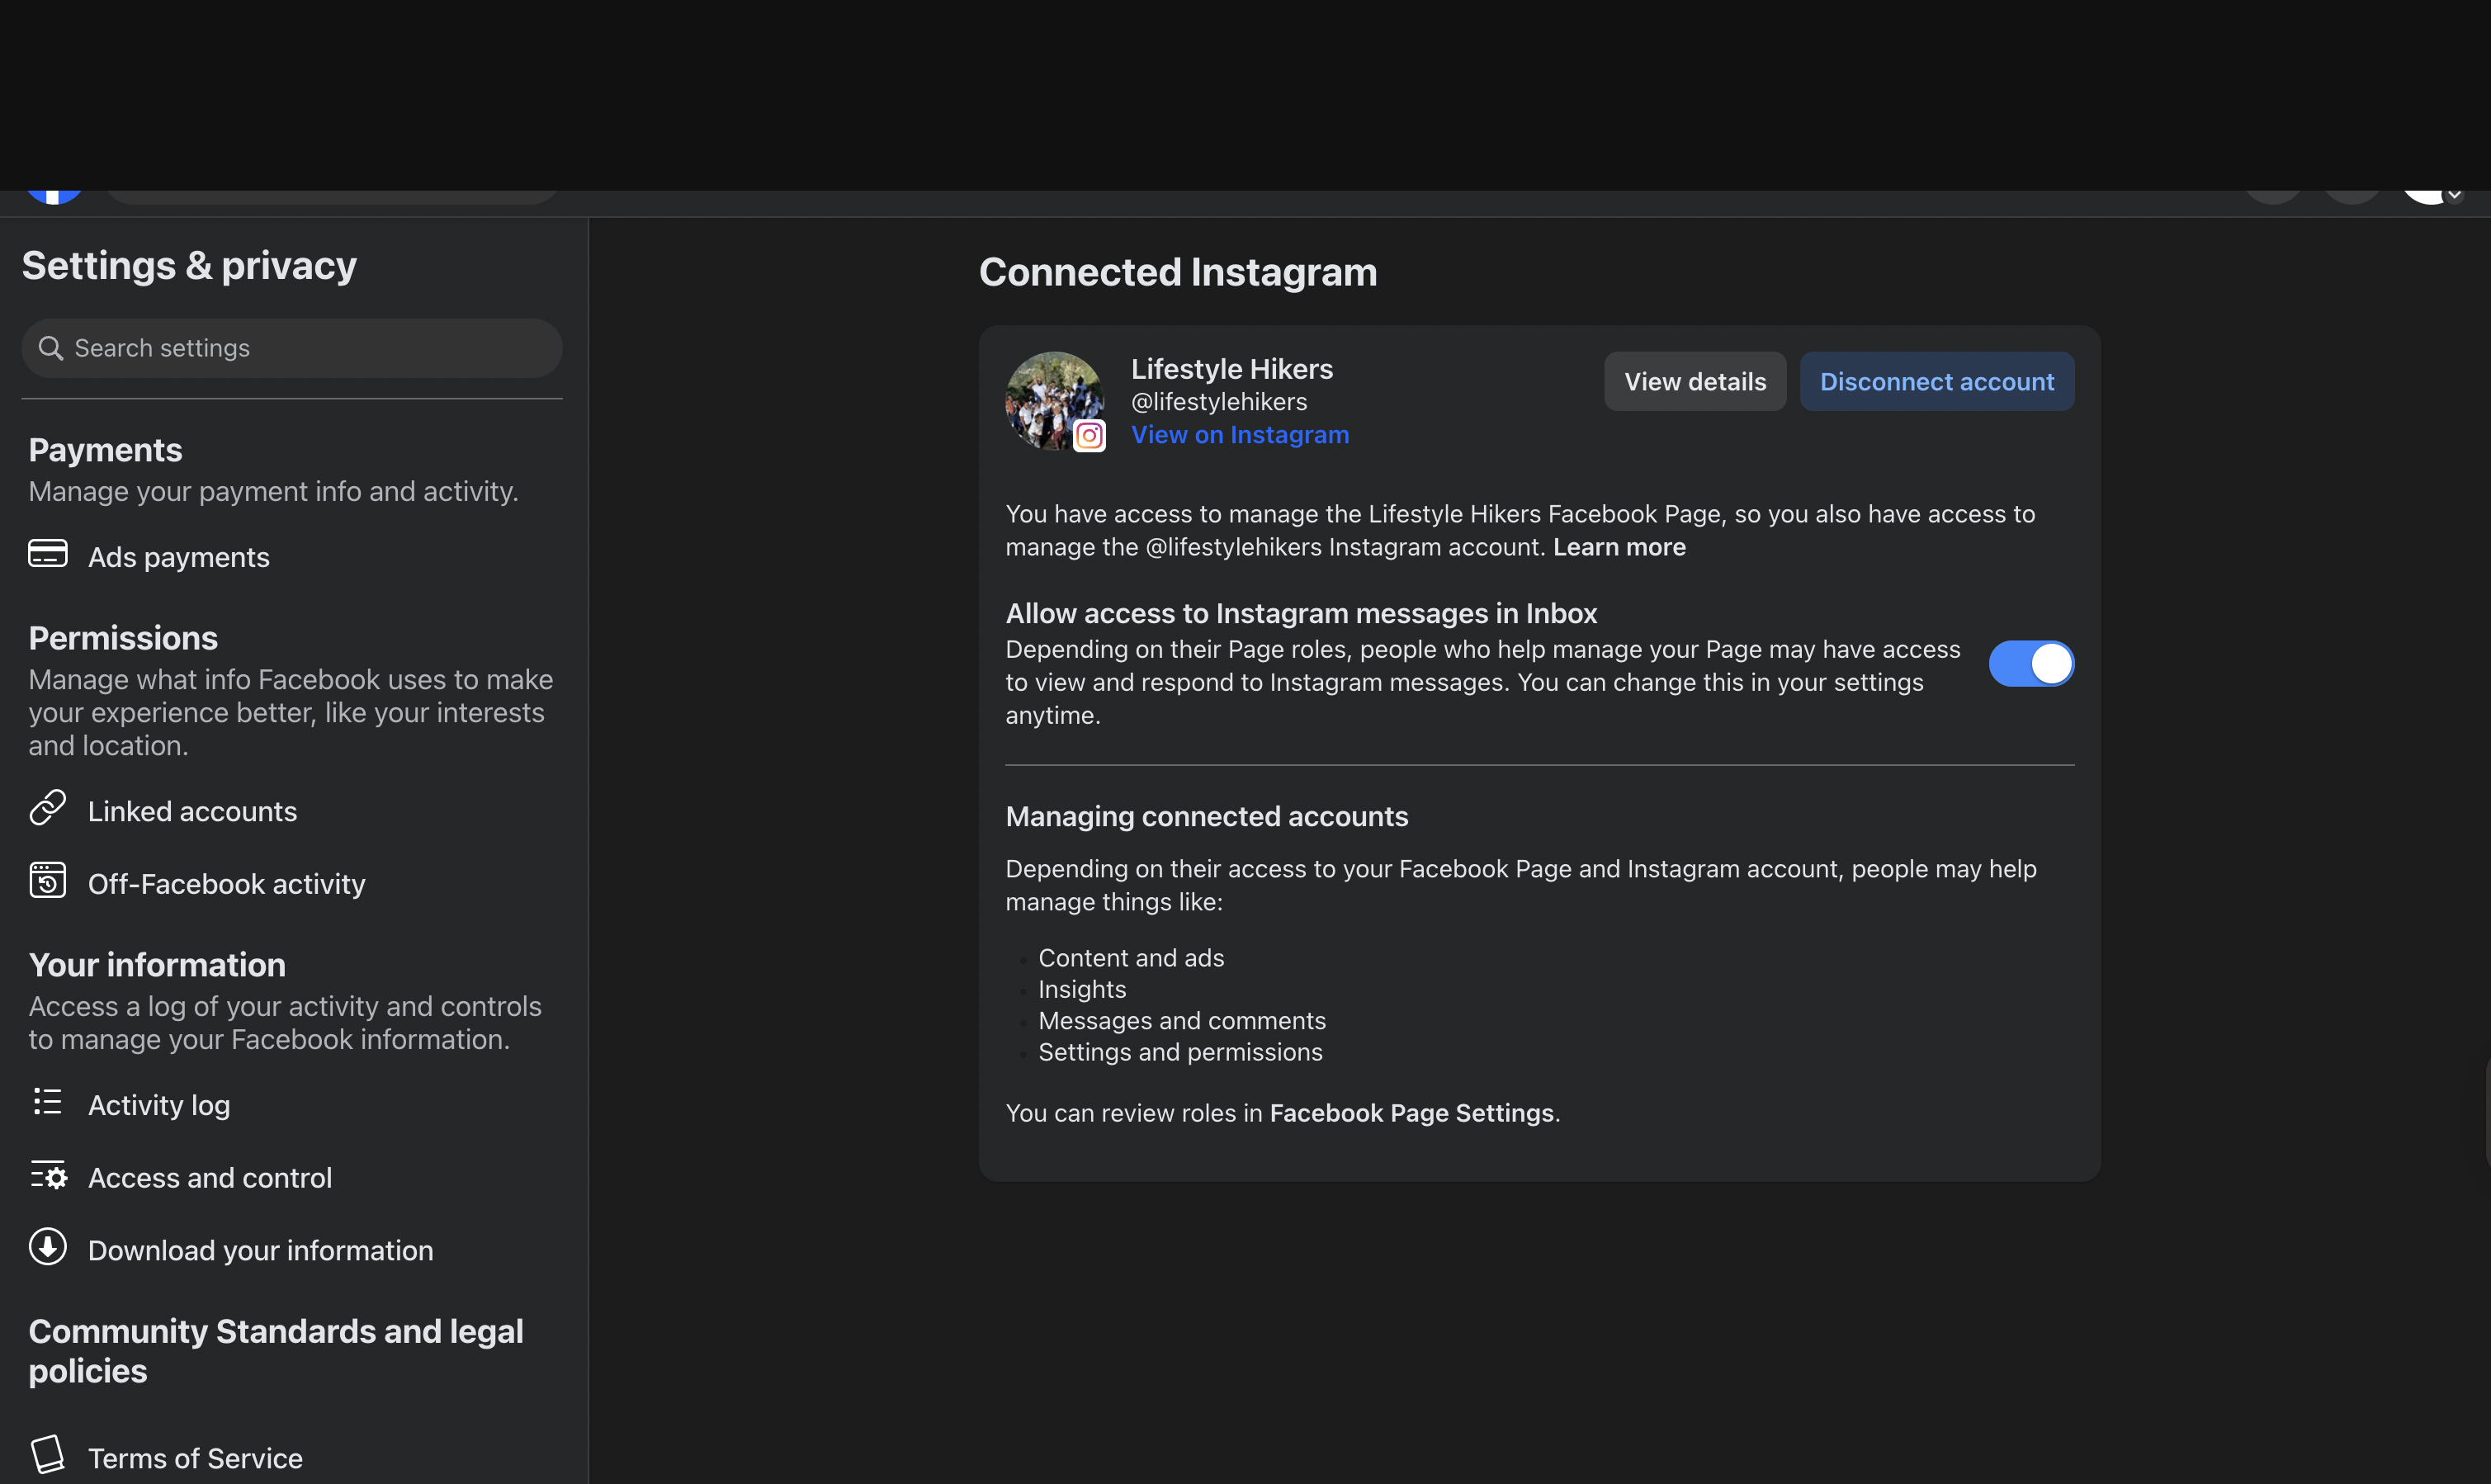 {: width="3018" height="1798" loading="lazy" decoding="async" }
Then I checked Page access and confirmed the correct Facebook user had Full control:
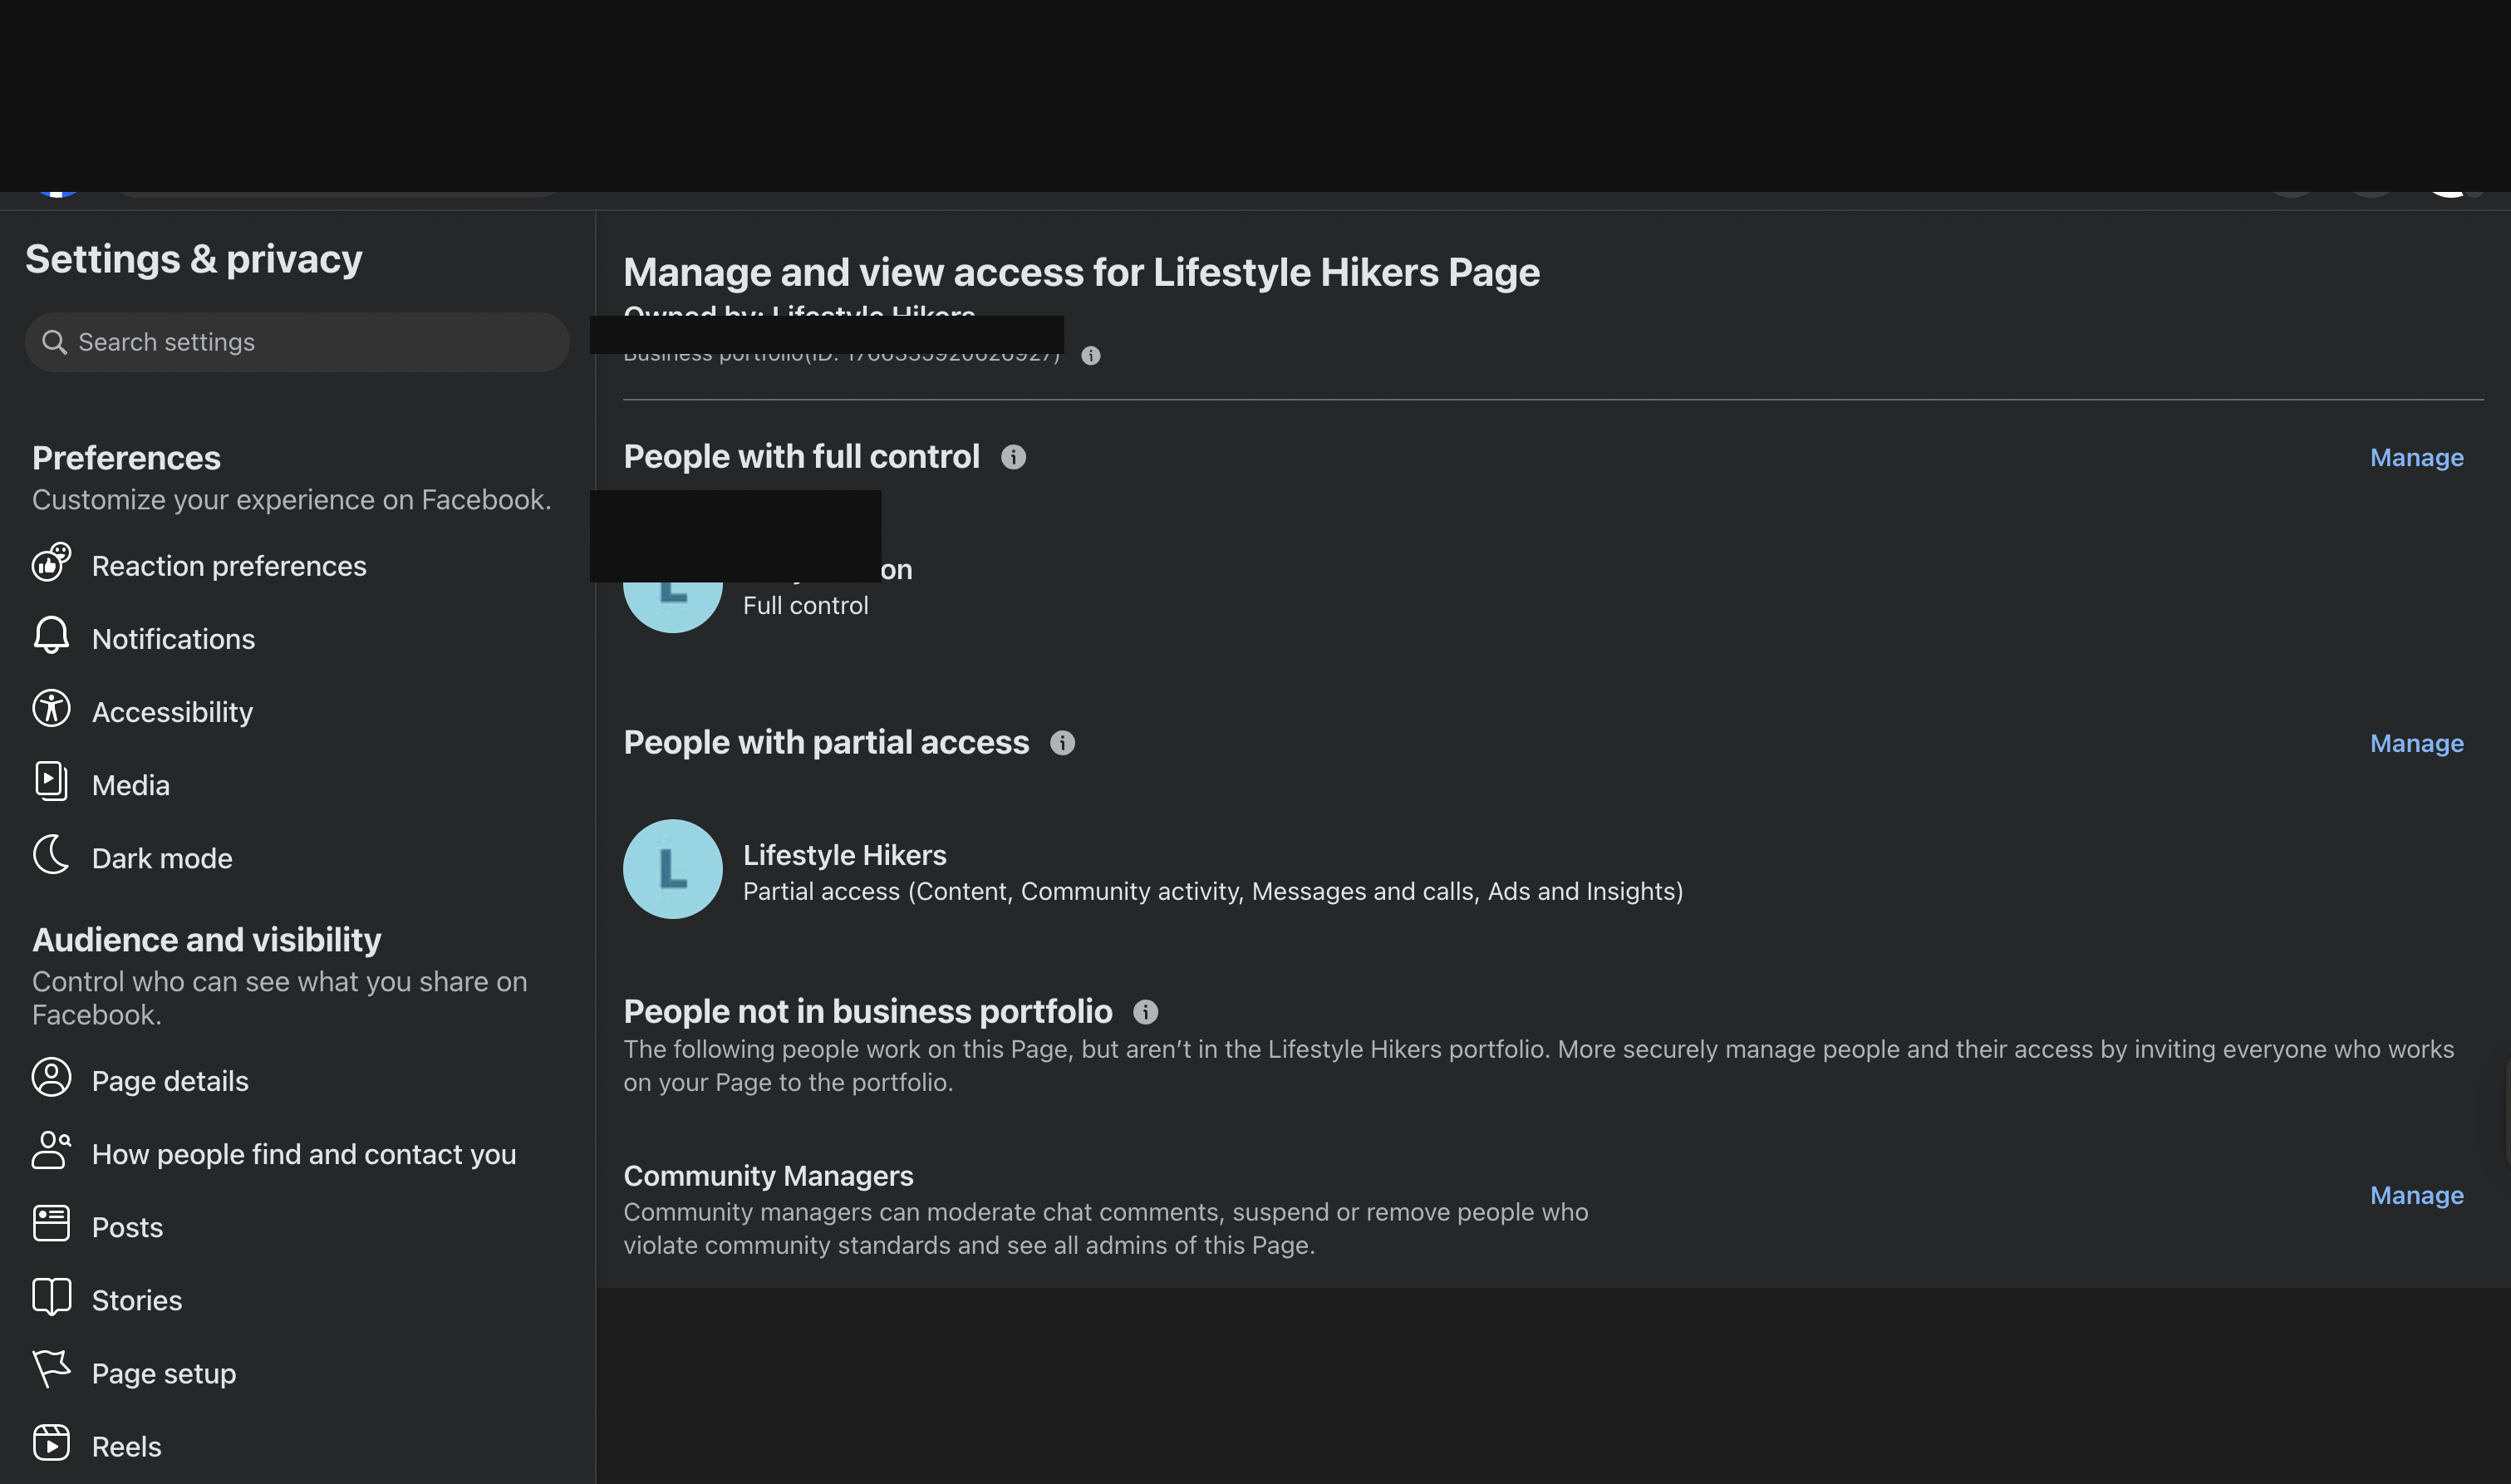 {: width="3022" height="1786" loading="lazy" decoding="async" }
If you skip this part, you will spend hours blaming tokens for a problem that is actually permissions.
Step 2: Generate the Right Token
This was the biggest trap.
At first, I had a token that looked real enough to trust. Meta disagreed. The API kept returning:
Invalid OAuth access token - Cannot parse access token
That error usually means one of three things:
- the token is malformed
- the token is incomplete
- it is the wrong token type for what you are trying to do
The fix was not "generate another random token and pray." The fix was using the correct flow:
- Generate a User Token in Graph API Explorer
- Grant these permissions:
pages_show_listbusiness_managementinstagram_basicinstagram_manage_messagespages_read_engagementpages_manage_metadata
- Use that user token to fetch the Page access token
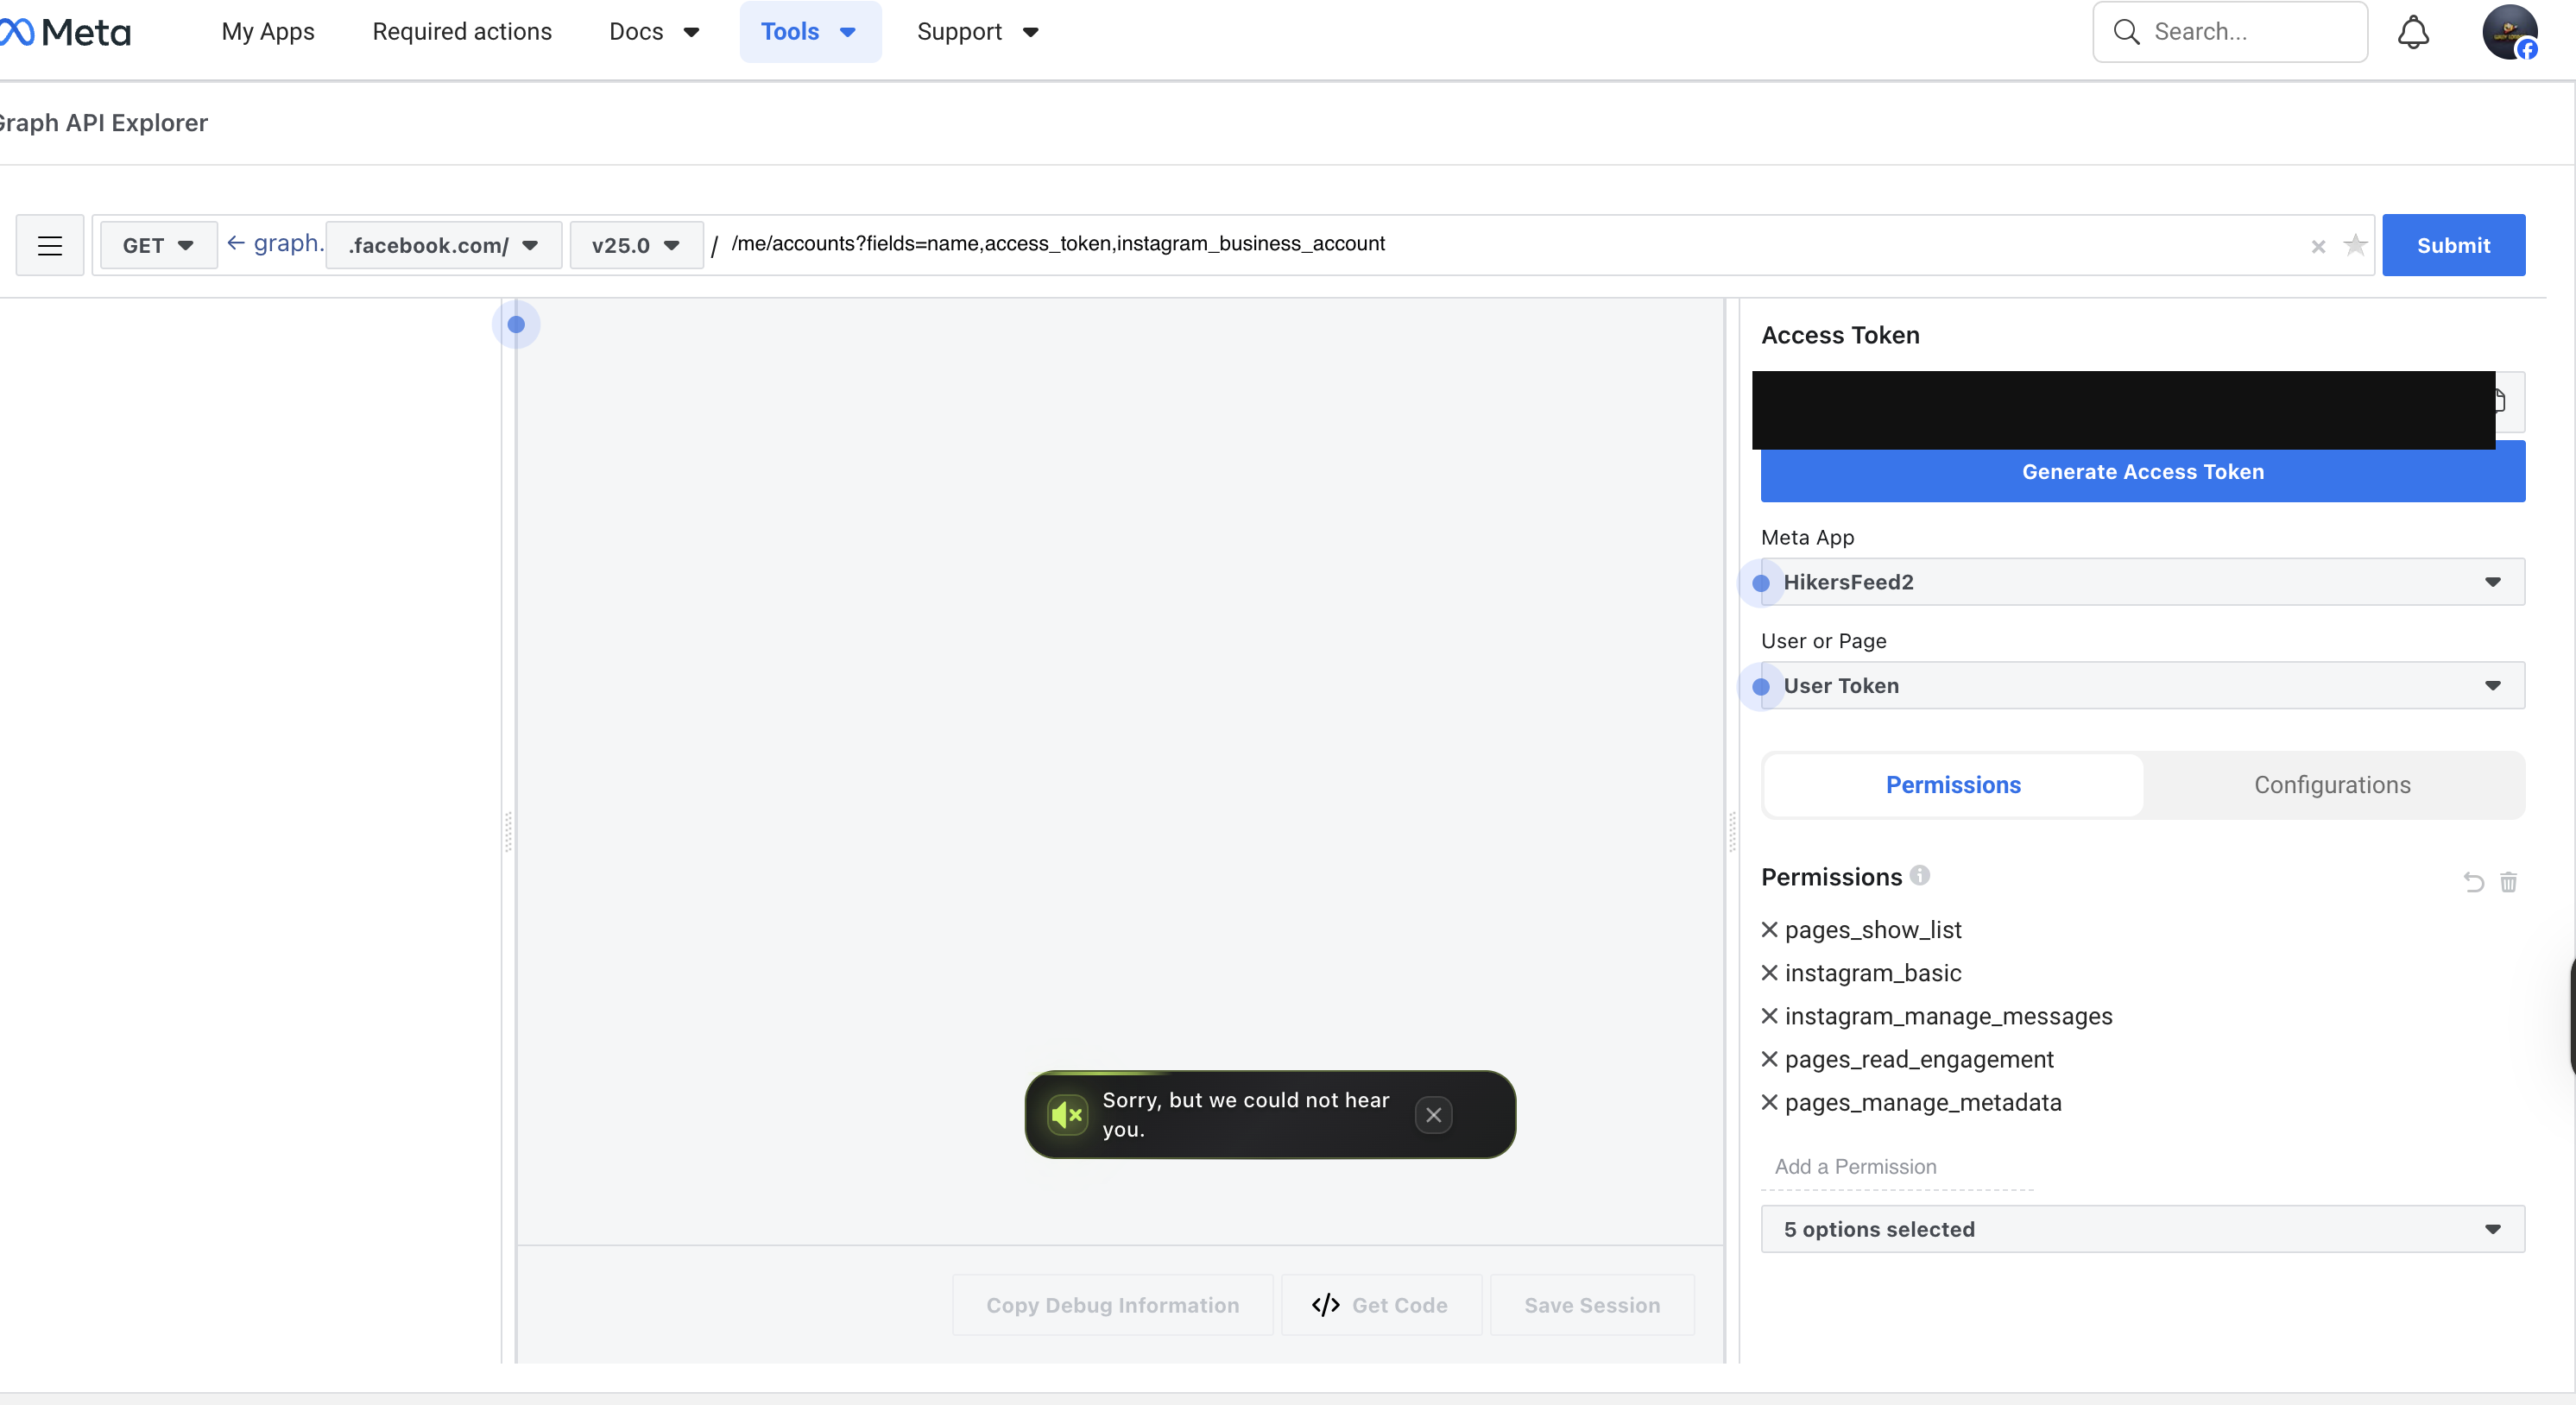
The Graph API Explorer setup looked like this. Again, I redacted the actual token and account-specific details:
{: width="2984" height="1628" loading="lazy" decoding="async" }
Then I queried the accounts endpoint for the Page token:
GET https://graph.facebook.com/v25.0/me/accounts
fields: id, name, access_token, instagram_business_account
access_token: USER_TOKEN
That response finally gave me the Page access token I actually needed for sending messages.
That is the token that belongs in n8n.
Not the user token. Not the first thing Meta puts in front of you. The Page token.
Step 3: Build the n8n Workflow
The workflow shape was pretty clean once the Meta side stopped fighting me.
I used two webhook paths on the same endpoint:
GET webhook
Used for Meta verification.
Meta sends:
hub.modehub.verify_tokenhub.challenge
If the verify token matches, the workflow responds with the challenge value.
POST webhook
Used for actual Instagram DM events.
The incoming event gives you the sender ID here:
entry[0].messaging[0].sender.id
And the message text here:
entry[0].messaging[0].message.text
From there, the workflow:
- extracts the sender ID
- normalizes the message to lowercase
- checks for trigger words
- sends the reply only if it matches
Step 4: Only Reply on Join-Type Questions
This part matters if you do not want your account sounding like a confused robot at a networking event.
I added logic in the n8n Code node to:
- read the message text
- convert it to lowercase
- check whether it includes a join/community phrase
The core idea looked like this:
const triggerPhrases = [
  'link',
  'join',
  'whatsapp',
  'group',
  'how to join',
  'sign up',
  'signup',
  'member',
  'membership',
  'community',
  'crew',
];

const matchedTrigger =
  triggerPhrases.find((phrase) => normalizedText.includes(phrase)) || '';

const shouldReply = Boolean(senderId && message && !isEcho && matchedTrigger);
That one check turns the workflow from "reply to everything" into "reply only when the person is clearly asking about joining."
Step 5: The Bug That Made It Send 20 Replies
This was the fun part. By "fun," I mean deeply annoying.
The bot started sending the same reply over and over again.
Why?
Because Meta was sending my own outgoing messages back into the webhook as events.
In other words:
- user sends message
- bot replies
- Meta sends the bot's reply back as an event
- workflow sees a new event
- bot replies again
- chaos
The clue was the is_echo flag inside the incoming payload.
Once I saw that, the fix was obvious:
- ignore events where
message.is_echo === true - ignore non-message events like edits or read-type callbacks
- only reply when it is a real inbound message
That one change stopped the reply storm immediately.
And honestly, this is why I always say the real work in automation is not the happy path. The real work is all the weird little "Why is the machine talking to itself?" moments.
Step 6: Send the Actual Reply Through Meta
Once the sender ID and token were correct, the reply node in n8n posted to:
https://graph.facebook.com/v21.0/me/messages
With a body shaped like:
{
  "recipient": {
    "id": "SENDER_ID"
  },
  "message": {
    "text": "YOUR_REPLY_TEXT"
  }
}
When I tested with a fake sender ID, Meta returned:
(#100) Parameter error: You cannot send messages to this id
That turned out to be a good sign.
Why? Because it proved the token was finally valid. The auth layer was working. The only reason it failed was because I used a fake recipient in testing.
That is a much better problem than "your token is nonsense."
The Final Reply I Used
I set the bot to answer with this message when someone asks to join:
Welcome to the Fam! 👋 We are happy to have you join us. No big requirements here, just bring good energy and the ability to manage the hike and you are good to go!
How to stay in the loop 📸 Follow us on IG:
@lifestylehikers🌐 Check the website:lifestylehikers.comHow it works When the next hike drops, you will see the date and meeting spot posted on our socials and the website. Just show up and you are in. It is as simple as that.
Important Please head over to the website and fill out the Join the Community form. This is the best way to stay updated and officially get plugged into the group.
About the WhatsApp group Our WhatsApp group is for active members only. You will get your invite after completing 3 hikes with us. That is how we keep the energy right and the group tight. Show up, hike, and your spot is waiting! 🏔️🌿
See you on the trail! 🇯🇲
That way the bot is useful, on-brand, and not pretending to be a full customer support department.
What I Learned
If you want the short version, here it is:
- Meta setup matters more than people admit
- User token first, Page token second
- n8n is great, but it will do exactly what you tell it, including dumb things
- echo events are real and they will absolutely make your bot talk to itself
- trigger-based replies are better than blanket autoresponses
Most tutorials stop at "send a message automatically."
That is not the hard part.
The hard part is making it send the right message, to the right person, at the right time, exactly once.
That is the difference between a demo and a real workflow.
If You Want to Build This Yourself
My recommendation:
- get the Instagram/Page connection right
- get the Page token correctly from
/me/accounts - verify the webhook before doing anything fancy
- add trigger-word filtering before going live
- always block
is_echoevents
Do those five things and you will skip half the pain I walked through.
And if your bot suddenly sends 20 messages in a row, congratulations, you are officially building real automation now.